Tuesday, 23 February 2016

More Gelli Plate Experiments

Hi All,

back again with another helping of Inspiration. Today I have a card and video tutorial for you which I made as my DT projects for STAMPlorations. First up is my finished card using part of the print from the video tutorial ...


... which I sponged with Pumpkin Pie and Tangerine Tango inks before stamping 'Discover Who You Are' from the Bold Sentiments: Discover set into part of the background. Acrylic ink almost acts like a resist and your dye ink will wipe off it, leaving you with a faded image.
I then added some stamping around the edges using a stamp from the Mixed Media Elements set. Next I embossed my sentiment from the Hope Blooms set and my butterfly from the Blossom Like A Butterfly set in Early Espresso on news print paper, fuzzy cut and edged my pieces using the matching marker pen and attached them to my card.
I used the pen to doodle a partial border, edge an off-cut of the print paper which I attached to my card  before stamping some stitched lines (Patchwork Frenzy: Graphic Squares) across it and finishing off with a gem on my butterfly.

I would like to enter my card at:
Craft Stamper Make it Take It challenge - Text Me! must use script or news print

Below is a short video tutorial on how I created my original print with my Gelli Plate and the ARTplorations Stencil: Bloom Factory ...


For more inspiration pop over to the STAMPlorations blog where leaving a comment will get you an entry into their monthly random prize draw for a $10 gift certificate.

That's it from me for today. I shall be back soon with some more Gelli Plate experiments ... until then ...

Have a lovely day!
hugs
Monika xxx

here is what I used in today's projects
Blossom Like A Butterfly, Hope Blooms, Bold Sentiments: Discover,
preview-BlossomLikeAButterfly preview-SRD-HopeBlooms copy preview-STAMPlorations-Discover

Patchwork Frenzy: Graphic Squares, ARTplorations Stencil: Bloom Factory
stmp1041.jpeg preview-web-stencil-043-BloomFactory

Pumpkin Pie, Tangerine tango inks, Early Espresso Stamp'n'write marker, Early Espresso embossing powder, news print paper - all Stampin'Up!
Acrylic Paints - The Works
Gelli Plate and roller - Amazon

Wednesday, 17 February 2016

Life Will Blossom

Hi All,

last post for today with a one-layer card using up some stash of pre-folded larger than I would normally use cards ...


I simply stamped the sentiment from Lili Of The Valley, added the dogwood from STAMPlorations (a smaller version can be found in their set here) and doodled some etching style lines instead of colouring them, you can see the technique in my YouTube video here. To finish I stamped the corners using a stamp from the Mixed Media Elements set (STAMPlorations) and added some golden highlights to the flower centers using a gel pen.

I am entering my card at:
Less is More - one-layer card including stem
Addicted to Stamps and More - Anything Goes

That's it from me for today.
Enjoy your day!
hugs
Monika xxx

Happy Little Stampers

Hi All,

As promised, the post with some of the finished cards from the prints of Monday's Gelli Plate demonstration I gave for my fellow Happy Stampers North West at my local craft club. I was using the Butterfly Birthday set by Happy Little Stampers. For my first card I combined one of the butterflies with its matching die.


If you want to know how I used the Gelli Plate in my cards, you can find a short video tutorial on my YouTube channel here and more cards using the same technique on my blog here.

I am entering my first card at:
Happy Little Stampers - Anything Goes with HLS stamps

I am entering my second card at:
Addicted to Stamps and More - Anything Goes

Well, that's it from me for now. Have a lovely day!
hugs
Monika xxx

Butterfly Prints 1

Hi All,

I promised you a while ago that you'd be seeing more of my Gelli Plate creations when I showed you how to use your Gelli Plate for mirror stamping in this post here. Well today I got another helping for you ... a simple printing technique using dye ink, roller/brayer and stamp.

Here are the results ....


After I had taken the prints, for which there is a short video, all I had to do was adding a sentiment and a few doodled lines before finishing off with some gems. I used the Blossom Like A Butterfly and Bold Sentiments: Hashtag Authentic sets by STAMPlorations to make these two cards which I used to showcase this technique at a demonstration I did for my local craft club ...


I am entering my cards at:
Addicted to Stamps and More - Anything Goes

I mentioned that there is a little video. Please make sure that your volume is turned up as my voice hasn't yet fully recovered from January's bout of colds. I also made a mistake when introducing the butterfly stamp, it is by STAMPlorations and can be found here.

At this point I am repeating the big THANK YOU to all my YouTube followers, 165 at the point of writing this post, and extend it to my Blog Followers too. I am still having problems with the 'Join This Site' button, it is not working, and I can't get it resolved. However, there is a solution, the tiny green square(s) to the right of it can be clicked and will allow you to join.

With no further ado ... here is the tutorial ...


You might now wonder what happened to the butterfly backgrounds, the finished cards will be posted  here on Tuesday 1st March 2016.

The prints I took during the demo can be seen here as finished cards. I had to split it up, otherwise the post would have been very long.

That's it from me for now, back shortly with more creations.

Have a lovely day!
hugs
Monika xx

Here is what I used:
Blossom Like A Butterfly, BoldSentiments: Hashtag Authentic
preview-BlossomLikeAButterfly stmp1090.jpeg
Coastal Cabana and Bermuda Bay inks - Stampin'Up!


Tuesday, 16 February 2016

Deer Cupcakes

Hi All,

back again with another helping of Inspiration. Today I have two cards for you which I made as my DT projects for STAMPlorations. First up is one using the Reindeer Games set in combination with the script from the Mixed Media Elements and the hearts from the Balloons and Banners sets ...


I stamped the reindeer, coloured it using Promarkers and gave it a coat of glossy Mod Podge which gave me the resist I needed for the antlers. Once dry, I masked off a circle and sponged with a little Pool Party, stamped the script and little hearts in the same colour and my sentiment in black before adding the embossed heart and layering on kraft base card to finish.

The little heart is cut from thick cardboard from which I removed the top layer. I then embossed it with Frantage and red embossing powders.

I am entering my card at:
Craft Stamper Make It Take It - Text me!, must have text or script in the background
Crafty Calendar - Love is in the Air

Next up is a sparkly cupcake card inspired by the Cupcake Inspirations and Inkspirational challenges ...


I spritzed my base card with gold Artiste Spritzing Ink, die cut a golden doily, stamped and fuzzy cut my cupcakes and added some sparkle to their wrappers using my clear rainbow Sakura gel pen. layered everything up, stamped my sentiment and added a confetti heart to finish. The stamps used are from the Sketched Cupcake set.

I am entering my card at:
Cupcake Inspirations - Photo
Inkspirational - Pop, red heart

Here is the photo I took my inspiration from:


For more inspiration pop over to the STAMPlorations blog where leaving a comment will get you an entry into their monthly random prize draw for a $10 gift certificate.

That's it from me for today. I shall be back soon with some more Gelli Plate experiments ... until then ...

Have a lovely day!
hugs
Monika xxx

here is what I used in today's projects
Reindeer Games, Mixed Media Elements, Balloons and Banners, Sketched Cupcake
preview-BigGrins-ReindeerGames SheryRuss_MixedMediaElements preview-DAIBalloonsandBanners stmp1057.jpeg

Monday, 15 February 2016

Happy Reminder

Hi All,

We are half way through February already and over at STAMPlorations the CASEplorations challenge is in full swing hence a reminder of our invitation to join us in the CASEplorations Playground. The Playground will be open for a whole month, the winner of the best CASE as voted for by the team gets a $15 gift certificate and two Top Picks will each receive a $5 gift certificate, full rules can be found here on the STAMPlorations Blog.

What is the CASE inspiration for this month, you might be asking. Well, it is a card by the fabulous Anita in France of My Papercraft World ...


Anita posted about her card here on her blog. There is lots of inspiration to take from her card, such as circles, hearts, rainbow colours, layers, bold sentiment, love theme ...

Here is what I picked:

  • bold sentiment
  • shaded colours
  • movement using flowers instead of circles
  • gems instead of hearts

Here is may reminder take of Anita's card ...


Using a flower from the VIGNETTE Eclectic Florals set and dye inks, I inked my flower up and stamped it in the different colours. With a damp brush I drew some of the outline colour into the petals which gives a very subtle colouring. Next I stamped the 'happy' in black and orange embossed the word 'be', both from the Sentiment Builders:Happy, layered on a yellow base card and finished off by adding some more movement through the addition of gems.

Pop over to the original Playground post or the reminder post to join the fun and to see what my teamies and Anita herself made as heir CASEs ... and of course to join our CASE challenge too.

That's it from me for today, back again tomorrow with more inspiration.

Have a lovely day!
hugs
Monika xxx

here is what I used in today's project:
Vignette Eclectic Florals and Sentiment Builders: Happy
stmp1038.jpeg stmp1051.jpeg
Daffodil Delight, Pumpkin Pie, Melon Mambo and Pacific Point inks - Stampin'Up!
Tuxedo Black Memento, tangerine Kerpowder! embossing powder, gems and yellow card from stash

Saturday, 13 February 2016

Most Loved

Happy Valentine's Day!!!

What better way to add to the Valentine's celebration than having some Cupcake Inspiration!
STAMPlorations are sponsoring their challenge  no 347, and we girls from the STAMPlorations Design Teams have been invited to play along. Inspiration is to be taken from the following photo ...


... and this is what I made of it ...


As you can see, I went for hearts, love theme, cupcakes, glitter, arrow and a touch of gold working with the following stamp sets and ARTplorations Stencil by STAMPlorations: Sketched Cupcake, Vignette Chevron and Arrows, Vignette Eclectic Florals, Sentiment Builders Love, It's All About You and Hearts All Over.

I started off stamping, colouring and masking my center cupcake before sponging my background using Smoky Slate, Crisp Cantaloupe and Strawberry Slush ink. Next I used the Hearts All Over Stencil and added some hearts in Cantaloupe and Strawberry. With my mask still on I added two further cupcakes in Slate. The arrow is made up of the stem from the Eclectic Florals set with the heart from the SB Love, and the chevrons from the Chevron & Arrows sets. A piece of ribbon and sentiment from the All About You set finished the card off,

If you feel inspired by Cupcake Inspiration and want to play along pop over ti their blog and look out for challenge 347. Good Luck!

This is it from me for today, I shall be back with more cards tomorrow and more cupcakes on Tuesday!

Anjoy your day!
hugs
Monika xxx

here is what I used:
Sketched Cupcake, Chevron & Arrows, Eclectic Florals, It's All About You, SB Love
stmp1057.jpeg stmp1031.jpeg stmp1038.jpeg stmp1001-a.jpeg stmp1091.jpeg

ARTplorations Stencil Hearts All Over
preview-web-stencil-007-hearts.jpeg

Smoky Slate, Crisp Cantaloupe and Strawberry Slush inks - Stampin'Up!
ribbon - Fantastic Ribbons
red and gold embossing powders, red glitter, kraft card, Spectrum Noir markers, Promarkers, gold gel pen, black Memento, white card from stash

Tuesday, 9 February 2016

Adjusting Sails

Hi All,

It's Inspiration time over at STAMPlorations. I was glad about a little crafting break during a busy weekend looking at narrowboats. It seems as if our plan is more difficult to achieve than we thought. Anyway I shall keep you updated as today we are having another look at a boat we saw yesterday. It was a wild card ... I liked it, Nick isn't so convinced ...

You probably guessed it ... this was the reason for today's nautically themed card ...


I started off spritzing some blue and gold Artiste in on a piece of white card. Next I stamped the script from the Mixed Media Elements set in Island Indigo and added the boat from the True North set in black Archival before painting in the sails and hull with glossy Mod Podge. Once dry I had a nice layer of resist which allowed me to blend the storm clouds around my boat without having to create a fiddly mask. I removed the excess ink from the mod podged boat with a very lightly damp tissue. Next I stamped my sentiment (True North) and the sea (Mixed Media Elements) and finished off by adding the birds (ARTplorations Some Birds stencil), all in Island Indigo, and layering on my Bermuda Bay base card.

This just made me giggle ... it seems as if all the good boats are disappearing in Cheshire's answer to the Bermuda Triangle ... no sheltered bay in sight ... lol

I am entering my card at:
Craft Stamper Make It Take It - Text Me!, must have text or script in the background

Pop over to the STAMPlorations Blog for more inspiration and to leave a comment for your chance to win a $10 gift certificate for their store in their monthly draw.

That's it from me for now. Hoping to be back soon.

Have a lovely day!
hugs
Monika xxx

here is what I used in today's project:
Mixed Media Elements, True NorthARTplorations Stencil Some Birds
SheryRuss_MixedMediaElements SheryRuss_TrueNorth-preview preview-web-stencil-037-somebirds

Friday, 5 February 2016

Love All Around

Hi All,

I have been playing with my Gelli Plate in preparation for a demonstration at my Craft Club in a couple of weeks time. Today I was trying out mirror stamping ... here are the results ...


The first card was actually stamped using one of the sticky, gel like mobile phone holders for your car dashboard. It is a good way for trying out this technique should you not wish to splash out on a Gelli Plate which certainly gives you a clearer print as you can see in my second card. The left hand seahorse and the right hand cat were stamped/printed in this way. The right hand seahorse is stamped, but I wasn't careful enough hence I disguised my bad stamping with a couple of hearts.

I am entering my 'Purrfect Love' card at:
Addicted to Stamps and More - CAS
Addicted to CAS - red

I am entering my seahorse card at:
Sisters Of Craft - Anything Goes
613 avenue Create - Anything Goes, use something from your stash - black hearts which I punched out a while ago, but never used

There is a short video showing the technique which I recorded in between seeing clients today, it's short and sweet as I didn't have time to finish my card there and then.


... a last look at both card ...


That's it from me for today. back soon.
Have a lovely weekend!

hugs
Monika xxx

here is what I used:
from STAMPlorations Sentiment Builders: Love, Pets and Vignette Celebrate Artsy
stmp1091.jpeg TBS-Pets-preview stmp1060.jpeg

From KatzelKraft Les Chats russes, Seahorse and Mur De Pluie
Les Chats russes - Tampon scrapbooking Tampon Seahorse - Tampon scrapbooking Tampon scrapbooking - Waterwall - Format A6

From Stampin'Up! the following inks: Bermuda Bay, Summer Sun, Melon Mambo and Real Red
From Stash: cool grey Promarkers 1,2,3 and black Memento ink; card and black punched hearts punch by Creative Memories, had it for ages)

Tuesday, 2 February 2016

Love And More Love

Hi All,

It's time for a little more inspiration over at STAMPlorations. Today I made two projects for you, nothing daring just good sturdy cards ...

The first one is a very girly shaker card ...


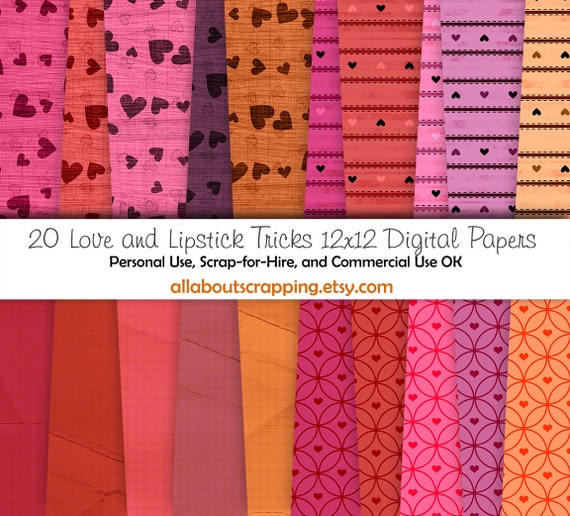
... the idea was to make the heart as big as possible. It is not one of my best cards, but there are a few good ideas here. I backed the heart with some paper from the Love and Lipstick collection (All About Scrapping, STAMPlorations' sister shop), which I think works quite well. I also like the way the little deer (Reindeer Games) stretches out its arms and legs ready for an embrace, I achieved this effect by only attaching the body and head with foam dots, this makes the arms and legs curve up naturally. The banner over the heart is a kind of cute too ... and that's when I became a little unstuck ... I am now wondering what it might look like having the little deer partially inside the heart .... guess I'll just have to make another card. :-D

Next up is an engagement card for Katie, which I shall give to her mum Dianne to pass on ...


I stamped the border in Pool Party using a stamp from the Grunge Floral Strips before silver embossing the ring from the Newlyweds Extras set and adding a diamond in the form of silver Perfect Pearls sprinkled with very sparkly glitter. To finish, I added a peel-off, silver twine and layered on my linen effect base card.

That's it from me for today, pop over to the STAMPlorations Blog for more inspiration provided by my teamies. Whilst there, leave a comment (each month a randomly drawn commenter will win a $10 gift certificate) and have a good look around for current challenges, tutorials etc

Back soon. Have a lovely day!
hugs
Monika xxx

here is what I used in today's projects, links are in the above text
preview-BigGrins-ReindeerGames stmp1047.jpeg stmp1092.jpeg 12" by 12" COMMERCIAL Use Digital Scrapbooking Paper - Love and Lipstick Tricks Digital Papers - Instant Download