Showing posts with label Gelli Plate. Show all posts

Tuesday, 29 March 2016

Borders ... Glorious Borders!

Hi All,

STAMPlorations have got some fantastic new stamps ... Artsy Borders!!! ... four in total ... Butterfly Row, Cupcake Row, Daffodil Row and Daisy Row ... You will LOVE them! They have already become my favourites as they make for easy, quick and classy cards!

They look absolutely stylish, simply stamped in black on white card and paired with a simple sentiment from the Bloom Sketches set and finished off with a few clear gems ...


This combination would make a great gift as a set of cards, and it is easy and quick to make, just perfect for those last minute birthday presents.

Of course you can add some colour too ...


... through adding some fuzzy cut and coloured elements, butterflies in my case, or ...


... through adding some acetate highlights, or ...


... trough colouring and fuzzy cutting the whole chain of glorious cupcakes, made a little more glossy with a coat of Mod Podge, or ...


... through adding a die-cut splash of colour and spritzing, or ...


... trough creating a faux no-line-watercolour look, for which I stamped the Daisy Row in Sap Green Archival before watercolouring around it with Pistachio Pudding SU ink and highlighting the daisy centers with Crushed Olive DI. To finish I stamped my sentiment from the Boxed Blooms set in Garden Green SU ink and added a couple of decorative score lines  and rounded corners.

There is even room for taking things much bolder ...


.... such as using a very bright colour scheme with a touch of glossy accents for a real Sugar Rush of a sweet treat, or even going all out artsy ....


... with a Gelli Plate print as backdrop inspired by a sunny Spring afternoon sitting in the garden with a cuppa ... birds tweeting ....
There is a little video on how I made the print which I spritzed with gold Artiste Spritzing Ink before cutting it to size. I then added some green dotted Washi, my coloured and fuzzy cut Daffodil Row and Sketchy Coffee Cup, my potting soil stamped Trendy Birds and a Noteworthy sentiment. Some doodles and sequins finished the look.

Well, and at the end once you finished making your card, you can always look over the piece of paper you used to try out your stamps or for stamping off and blending etc. to see, if there is a card like this, you could make ...


I found this piece of paper on the messy stamping paper (scrap paper in other words), I had been using for quite a while, and simply added some stamped splashes from the Mixed Media Elements set, the sentiment from the Bloom Sketches set, some doodles, ink spray and sequins.

Well, all of these pieces of inspiration came about before I was even following my original idea and pairing the borders with their full size counterpart like the Cupcake row with the Sketched: Cupcake and the Daisy Row with the daisy from the Bloom Sketches ... I guess these will have to wait for another post ....


here is the little video:

That's it from me for now.
Have a lovely day!

hugs
Monika xxx

here is what I used:
Butterfly Row - Artsy Borders, Cupcake Row - Artsy Borders, Daffodil Row - Artsy Borders
SheryRuss_ButterflyRow2x6-preview SheryRuss_CupcakeRow2x6-preview SheryRuss_DaffodilRow2x6-preview
Daisy Row - Artsy Borders
SheryRuss_DaisyRow2x6-preview
Bloom Sketches, Sketched: Cupcake, Boxed Blooms, Sugar Rush, Sketchy Coffee Cups,
BloomSketches.jpeg stmp1057.jpeg stmp1053.jpeg stmp1083.jpeg SRD-SketchyCoffeeCups-preview

Trendy Birds, Noteworthy, Mixed Media Elements
TrendyBirds-web-preview Noteworthy-preview SheryRuss_MixedMediaElements

Tuesday, 1 March 2016

Butterfly Prints 2

Hi All,

Happy St David's Day to all my friends with a Welsh connection. I had hoped to get another project ready ... one which would feature daffodils which are blooming beautifully all over Wales ... that was before I thought it would be a good idea to finally download 'Windows 10' ready to install later on ... or so I thought ... it went into full installation mode ... and panic station this morning when I seemed to have lost all my saved links and data. That was after it took up all afternoon and evening into the night yesterday to finish the installation process. As you can imagine, I wasn't a happy bunny.

The initial bits are now a sort of sorted, and I can write my posts.
Well what a turbulent few days I had ... Friday we got a buyer for our house, fingers crossed. Saturday and Sunday, we had some time away in Anglesey from where we came back yesterday. Most of our weekend there was spent discussing how we were going forward with our plans now to achieve our goal of owning and living on a narrowboat whilst travelling the canals. We are gradually getting closer to fulfilling our dream. More about this over the next few weeks ....

Today's inspiration as my DT contribution to STAMPlorations' Inspiration feature comes from the other two Gelli Plate makes from my post and video tutorial here. The first one, the Gelli Plate print itself, had quite a lacy feel to it, and I simply added the butterfly and sentiment in Bermuda Bay to enhance this feel ...


... a white doodled border and gems finished off my project.

My second one, using the piece with the butterflies only, has a little GRUNGE ...


I added some more butterflies in Coastal Cabana and blended the edges using the same colour. I then added a little border using a stamp from the Mixed Media Grunge set and my sentiment in Elegant Eggplant before layering on a matching base card and adding a few gems to finish.

That's it from me for now. Pop over to the STAMPlorations Blog for more inspiration and to leave a comment for your entry in their prize draw.

I shall be back shortly for the start of March's CASEplorations Challenge.

hugs
Monika xxx

here are the stamp sets I used in today's projects:
Mixed Media Grunge, Blossom Like A Butterfly
MixedMediaElements-preview.jpeg preview-BlossomLikeAButterfly

Wednesday, 17 February 2016

Butterfly Prints 1

Hi All,

I promised you a while ago that you'd be seeing more of my Gelli Plate creations when I showed you how to use your Gelli Plate for mirror stamping in this post here. Well today I got another helping for you ... a simple printing technique using dye ink, roller/brayer and stamp.

Here are the results ....


After I had taken the prints, for which there is a short video, all I had to do was adding a sentiment and a few doodled lines before finishing off with some gems. I used the Blossom Like A Butterfly and Bold Sentiments: Hashtag Authentic sets by STAMPlorations to make these two cards which I used to showcase this technique at a demonstration I did for my local craft club ...


I am entering my cards at:
Addicted to Stamps and More - Anything Goes

I mentioned that there is a little video. Please make sure that your volume is turned up as my voice hasn't yet fully recovered from January's bout of colds. I also made a mistake when introducing the butterfly stamp, it is by STAMPlorations and can be found here.

At this point I am repeating the big THANK YOU to all my YouTube followers, 165 at the point of writing this post, and extend it to my Blog Followers too. I am still having problems with the 'Join This Site' button, it is not working, and I can't get it resolved. However, there is a solution, the tiny green square(s) to the right of it can be clicked and will allow you to join.

With no further ado ... here is the tutorial ...


You might now wonder what happened to the butterfly backgrounds, the finished cards will be posted  here on Tuesday 1st March 2016.

The prints I took during the demo can be seen here as finished cards. I had to split it up, otherwise the post would have been very long.

That's it from me for now, back shortly with more creations.

Have a lovely day!
hugs
Monika xx

Here is what I used:
Blossom Like A Butterfly, BoldSentiments: Hashtag Authentic
preview-BlossomLikeAButterfly stmp1090.jpeg
Coastal Cabana and Bermuda Bay inks - Stampin'Up!


Monday, 9 March 2015

ARTplorations Stencils Blog Hop Day 2


Hi All! Welcome to Day 2 of the ARTplorations Stencil Blog Hop, where we, The STAMPlorations Girls, are putting stencils through their paces.
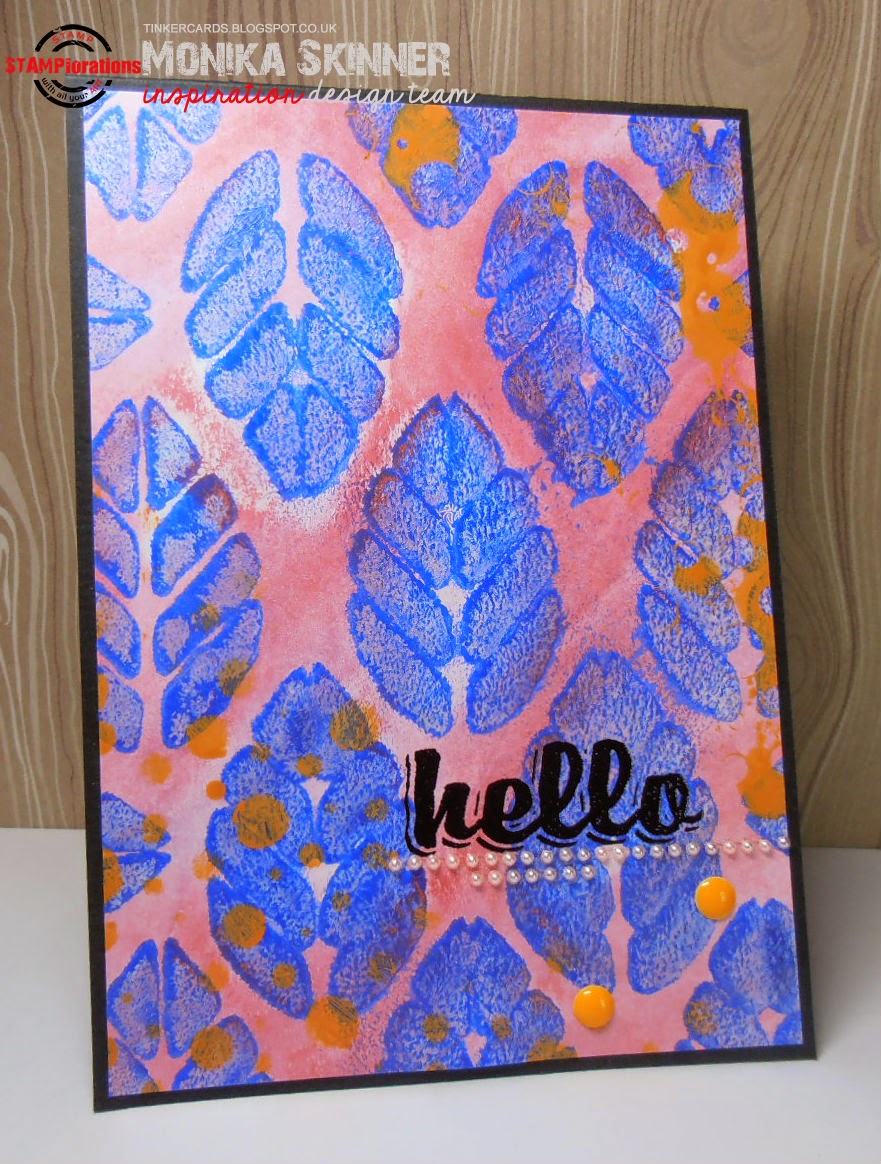
Again I have been going a little bold and crazy today using some of the Gelli Plate backgrounds I made using ARTplorations Stencils Leaf Prints.


I worked with two of the prints I took from one application of acrylics. I first started by laying down some ultramarine, put my stencil on top and applied some metallic silver through my stencil. I then lifted my stencil off and took the first print, which forms the background in my first card. The second print is the one I altered adding some Metallic Melon Gelattos and Spiced Marmalade Distress Paint. I cut both pieces to size and added a strip of plasterboard tape, some sponged die cut flowers, a butterfly and sentiment both from the Trendy Butterflies set to my first card. I decided to white emboss my sentiment on a strip of off-cut to help it blend in better. After layering it all as seen on my pink base card I simply added some silver pearls and a touch of glitter to finish.


For my second card I black embossed my sentiment from the Boxed Blooms set, layered on my black base card and added some pearls and candy dots to finish.

Please leave a comment, and you'll be entered in our prize draw, the details of which are:

SIX winners, that's two per day randomly drawn from all the comments left on our blogs, will receive their choice of ARTploration Stencil.

THREE winners, randomly drawn from comments left on the STAMPlorations Blog Blog Hop Posts, will receive a $15 gift certificate from the STAMPlorations Store.

plus surprise prizes

Make sure you leave a comment when visiting our blogs, you can find all the links here.

That's it from me for today, back tomorrow with more stencil inspiration for Day 3 of the ARTplorations Stencil Blog Hop.

Have fun hopping!

hugs
Monika xxx


preview-web-stencil-001-leaves-large.jpeg stmp1053.jpeg stmp1082.jpeg

More Gelli Plate

Hi Everybody,
Thanks so much for all your lovely comments. They are very much appreciated. As you might have noticed there is a Blog Hop going on over at the STAMPlorations Blog. This time around it's all about stencils, and the STAMPlorations girls got bags of ideas, tips, tricks and techniques to share. You can find the projects from Day 1 here.

Now to today's project I want to share. I used one of the Gelli Plate backgrounds I created the other day using the ARTplorations Stencil Shutters in combination with the Blossom Overture and Hashtag Authentic stamp sets. Here it is:


First I put down a layer of metallic silver acrylic paint on my Gelli Plate on which I put my stencil. Then I spread a little mustard acrylic paint over part of the stencil before removing the stencil and taking my first print, which is the one I used for this card. I still need to record a video on how exactly I make my prints, for now Shery has a quick demonstration here which is similar to what I do.
I stamped, coloured (Promarkers: gold, tulip yellow, honeycomb, burnt orange, pear green) and fuzzy cut my rose from the Blossom Overture set, heat embossed the sentiment amazing and stamped the you are in green. I then layered my elements on a green base card and attached some twine and metal charm to finish.

This card is part of the Inspiration Post over at the STAMPlorations Blog. This is where we invite you to pick one of our creations, CASE and enter it at the CASEplorations Playground for your chance to win $15 gift certificate or two ARTploration stencils of your choice. You can find all the information here.

I would like to enter my card at:

Crafty Calendar - add metal
Sisters of Craft - anything goes
Scribble and Scrap - anything goes
Crafts Galore Encore - anything goes
613 Avenue Create - Anything Goes

Next up is a quick feel better card, one can never have too many of these ...


I simply stamped and heat embossed the chevrons, stamped my sentiment, stamped, coloured, fuzzy cut and attached my rose, doodled a border and added some gems and glossy accents to finish.

I am entering this card at:
Addicted to Stamps and More - CAS
Stempelsonne - anything goes with stamp as main focus

Hope you enjoyed my little offering today. If you did and you would like to follow my blog, you can either follow through Google+ or by clicking on the small green squares next to the join this site button.
I shall be back shortly with my projects for Day 2 of the ARTplorations Stencil Blog Hop.
See you there.
Have a lovely day!
hugs
Monika xxx

here is what I used:
from STAMPlorations
StampClub-BlossomOverture-preview.jpeg stmp1090.jpeg preview-web-stencil-006-shutters.jpeg stmp1031.jpeg
Gumball Green ink and card, Wild Wasabi ink, Early Espresso ink and embossing powder, Riding Hood Red Stamp'n'Write Marker and glossy accents/ crystal effects - all from Stampin'Up!
Twine from Fantastic Ribbons
metallic silver acrylic paint from Poundland
mustard acrylic paint from HomeBargain
gold embossing powder, gems, charm from stash

Sunday, 8 March 2015

ARTplorations Stencils Blog Hop Day 1


Hi All! Welcome to the ARTplorations Stencil Blog Hop!!!
This is where we, the STAMPloration Girls, put our ARTplorations Stencils through their paces. If you follow our Spotlight Features, you might have noticed that we have been using them a lot giving you in depth tutorials, and now we are back with loads more!!!

Today is Day 1, and I have gone a little bold and crazy as I got carried away experimenting ...


Well I do like using my alcohol markers over inked backgrounds for a floating and transparent look. You may remember I did play with this technique a while ago here and here for example. Any way I gave it a go using the ARTplorations Bold Florals Stencil and Tinge Alcohol Markers Sky Blue and Brilliant Blue. The background was one I made the other day when playing with my inks, you can find the explanation here plus some more stencil ideas ... but now back to today's HOP PROJECTS.
I simply used the Bold Florals stencil for the outline and then coloured with my markers, added a clear embossed sentiment from the Bloom Sketches set for the unexpected hidden message, layered on a pink base card and added some clear glitter to the center of my flower.


For my next card I used one of the backgrounds I created when I was playing with my Gelli Plate and some of my homemade scented embossing paste, you can find the tutorial for the paste and how I masked here, The background was created when I rolled the leftover paint off my roller. I did however smudge a little when I applied my paste hence I simply added a little stalk, brushstroke from the Celebrate Artsy set, which makes my smudges look like little leaves. :-) I added my sentiment from the Celebrate Artsy set, layered on my black base card and finished off by adding some champagne glass glitter to the center of my flower.


That's it from me for today, I shall be back again tomorrow with more stencil inspiration for Day 2 of our Blog Hop. Please leave a comment, and you'll be entered in our prize draw, the details of which are:

SIX winners, that's two per day randomly drawn from all the comments left on our blogs, will receive their choice of ARTploration Stencil.

THREE winners, randomly drawn from comments left on the STAMPlorations Blog Blog Hop Posts, will receive a $15 gift certificate from the STAMPlorations Store.

plus surprise prizes

Make sure you leave a comment when visiting our blogs, you can find all the links here.

Have fun hopping!
hugs
Monika xxx


here is what I used:

preview-web-stencil-002-bold-florals.jpeg stmp1061.jpeg stmp1060.jpeg

Tinge Alcohol Markers - The Works
Strawberry Slush card, Champagne Glass Glitter, Poppy Parade ink and ink refill, Melon Mambo, Tempting Turquoise and Island Indigo ink from Stampin'Up!