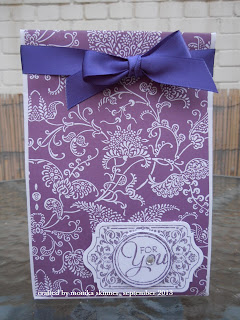
Today I will guide you through making this gift bag using an envelope.
You can use any size envelope, all you have to do is adjust the width of the score lines to get a depth suitable for your size envelope.
The envelope I used for this tutorial is about 21x15cm.
Step 1: Seal your envelope making sure that it is fully sealed around the edges. Then cut a sliver off the side you want to use as your bag top, I used one of the narrower sides.
Step 2: On the three remaining sides score 2.5cm in from the edge or less if you're using a smaller envelope. Fold along the score lines.
Step 3: Cut some pretty paper to fit the front and back as shown and adhere.
Step 4: Fold the corners into triangles as shown and adhere them to the base of your bag.
Step 5: Score a line wider than the width of your ribbon from the top edge of your bag. (the ribbon I used is about 1.5cm wide and the line is scored at 2.5cm) Attach some sticky double sided tape to one side at the top of your bag and centrally adhere some ribbon to it.
Step 6: Fill your bag, fold along the score line with the ribbon staying on the outside and tie your ribbon at the front of your bag.
Step 7: Decorate your bag as you like. I used the Chalk Talk Stamp Set and Sizzix framelits from Stampin'Up! for my simple message.
Enjoy and Happy Crafting!!!


