Showing posts with label dots all over stencil. Show all posts

Thursday, 10 February 2022

Another Catty Birthday

Hi Friends!

Something cute again from me today ...


The cats had to come out again for another play. They were stamped with black Versafine and coloured using a mix of brush markers and Izink inks. The stencilled background adds extra interest and depth.


The cats are from a set which came with a magazine some time ago, the Dots All Over stencil is by STAMPlorations and the sentiment is from a set by Uniko Ltd.

Wishing you a lovely day!
hugs
Monika 💕

Wednesday, 14 April 2021

Christmas In The Air

Hi Crafty Friends!

Well, you might be looking forward to summer, but it's also the best time to get a head start on making your Christmas card stash. If one wants to get organised that is. 😁

Today I'm sharing a few projects made for April's Christmas In The Air feature over at STAMPlorations. In this special feature Nancy and I are taking turns sharing a few Christmas projects each.


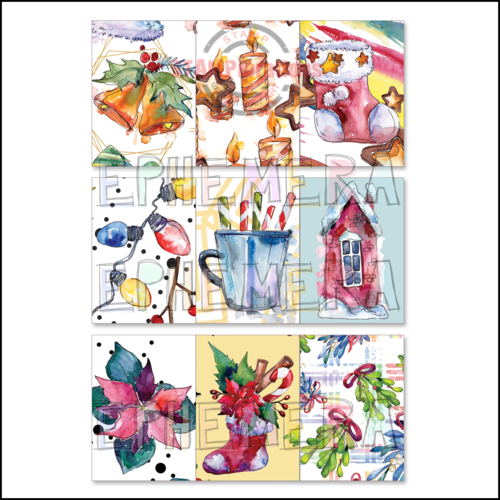
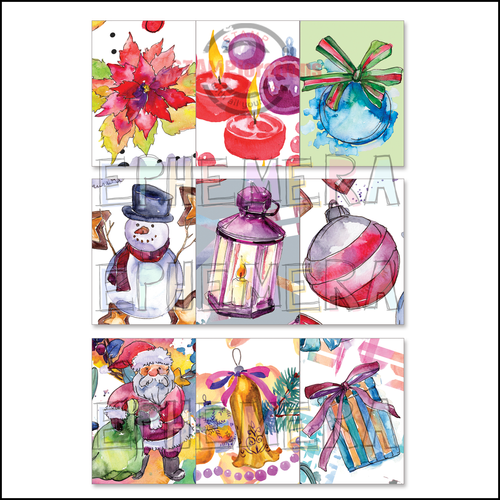
This month it's my turn to put STAMPlorations Christmas In The Air Kit #1 through it's paces the full content of which will be shown at the end of this post. It's going to be picture heavy as I got a whopping 9 cards to share.


Let's start with the Christmas Trees stencil from the kit.


For my first card, I blended Moved Lawn and Peeled Paint DI's and Aurore and Brou De Noix Izink inks through the row of Christmas trees to create the backdrop for the campervan from the Christmas Ephemera #1 pack. I finished off with a stamped sentiment from the Christmas Joy set contained in the kit.


For my second card I simply embossed the trees with Snowflake embossing powder and the sentiment with silver embossing powder. A few white splatters were added to finish.


Next up are a couple of cards featuring the candle from the Christmas Joy set in combination with the corresponding laser cut shapes from the kit. I used watercolour pencils with a lightly damp brush to colour my candles.


The background was created using the Ovals Flexi-Template with ombre shades of yellow DIs similar to how I used them in this post here for the fairy card just in reverse order. I started with the largest oval and the lightest yellow adding the smaller ovals with each darker colour. Once finished I used the Ovals as mask and stamped the floral stamp from the Christmas Joy set with Rustic Wilderness DI before adding the doodled border.

It didn't matter that the image didn't stamp fully in places, it adds to the rustic charm of my card. If you want it to stamp fully, make sure to use a stamping mat underneath your card and firmly press the stamp down especially around the Ovals Flexi-Template mask.


My next card uses a pearlised base card embossed with the Dots All Over Stencil. I simply added my candle and a sticker sentiment before finishing off with a touch of glitter.


My next set of cards uses some of the Christmas ATCs from the kit.


I had this festive background using the Joyful set which was stamped directly on a base card. It had been too fain for what it was originally intended for yet it was perfect to go with the lantern ATC.


I simply assembled my elements and finished off with sequins and a touch of glitter.


The bauble card a sort of made itself.The ATC was matted on a piece of sparkling silver card and attacked to my base card. A big bow and sticker sentiment finished my card off beautifully.


My next set of cards uses the Coffee Cups Colorables in combination with Christmas Ephemera #1 shapes and sticker sentiments. Instead of colouring the cups I used them as mats for the Ephemera shapes after having added some red and golden splatters. The base cards were embossed with the Holiday Words Mask.


The first card of the set uses the nutcracker and was finished off with gems, glitter and a couple of rounded corners.


The second one uses the bauble and was finished off with a large bow, sequin and sentiment down the side.


The third card features one of the Christmas Trees and was finished off with sequins.


This is how I've used the kit so far and I haven't even scratched the surface. There are still plenty more cards and festive makes left in the Christmas In The Air Kit #1. I shall be back in June with another array of festive makes.

Here are my affiliate link to all the products used from the STAMPlorations Store:


***********


Should you find yourself placing an order, feel free to use my personal discount code STAMPGIRLMONIKA at checkout for a 20% discount on your order. Please note that my discount code can not be combined with any other coupon code, but you can use it as often as you wish. I've got to be honest, if you use the code and/or the link to the STAMPlorations Shop I provide in my posts for your purchases, I will get a little reward.


I hope you feel inspired to start adding some projects to your Christmas stash.

hugs
Monika ❤

Tuesday, 14 April 2020

Beach Happy

Hello Crafty Friends!

It's Tuesday and this means it's Inspiration Time over at STAMPlorations.  I thought I'd share an somewhat uplifting card to remind ourselves that nature's beautiful beaches will still be there for us to be enjoyed in good time ...


I die- cut a rectangle from a piece of yellow card using one of the Basic A2 Panels Nesting Dies and decorated it in the style of one of our beach towels using some of the smaller stamps from the Artsy Tribal Doodles set. I finished off with a sandcastle, sunglasses, sentiment (all from Beach Vibes) and a few stencilled dots. Enjoy! 💖


If you feel like bagging yourself a bargain and take advantage of STAMPlorations' Spring Clearance Sale check out the graphic at the end of this post.
You can check out all of STAMPlorations' current promotions here.

That's it from me for today. Pop over to the STAMPlorations Blog to check out my teamies' beautiful makes.

Hope you're having a lovely week!

hugs
Monika xxx


here is what I used from

- STAMPlorations Shop:

Beach Vibes, Artsy Tribal Doodles, Dots All Over Stencil, Basic A2 Panels Nesting Dies
00preview-BeachVibes preview-Shery_Russ-ArtsyTribalDoodles preview-web-stencil-077-DotsAllOver stamplorations-basica2paneldies-preview

this is the graphic for STAMPlorations current sales

Sunday, 23 February 2020

Sweet Peony

Hi Crafty Friends!

Sharing another card I made just for fun because I fancied doing some colouring ....


... and because I love this gorgeous Peony stamp set by Uniko. It's stamped and coloured using my metallic pencils and finished off with a bit of stencilling.

I didn't add a sentiment, because I felt it would detract too much from the beautifully drawn bloom.


That's it from me for today.
hugs
Monika xxx

here is what I used:
Peony stamp - Pure Florals: Peony by Uniko
stencil - Dots All Over ARTplorations Stencil by STAMPlorations
metallic colouring pencils - Aldi, past special buy
Tempting Turquoise ink - Stampin'Up!
white base card - The Works

Saturday, 22 February 2020

Get Well Soon

Hi Crafty Friends!

Sharing another layered trees make. This time I used three ...


... and popped them up against a strip of Washi, added a bit of stencilling and stamped sentiment finishing off with sequins.


That's it from me for today. Wishing you a lovely Sunday!
hugs
Monika xxx

here is what I used:
tree die - Gratitude Trees Layering Dies by STAMPlorations
stencil - Dots All Over ARTplorations Stencil by STAMPlorations
sentiment - Sweet Little Sentiments by Clearly Besotted
Washi tape - Stampin'Up!

Tuesday, 12 November 2019

Thank You

Hello Crafty Friends!

It's Tuesday and this means it's Inspiration Time over at STAMPlorations. This week they are celebrating with a little Thanksgiving Blog Hop.


It is also the perfect time for me to say THANK YOU for the lovely comments you've been leaving. For today's project I have chosen autumnal colours to go with the new Gratitude Trees Layering Dies, have a look ...


I cut one of the trees in multiple colours and layered them as multi coloured trees on a stenciled background. I finished off with a stamped sentiment and sequin.

How can you join the Thanksgiving Celebrations ...

Shery has a little fun planned for you, in as much that there are certain tasks that need completing to be entered in a special Rafflecapter prize draw to win 1 year or 6 months worth of craft supplies. You cab check out the graphics below. All the details to this special draw can be found here on the STAMPlorations Blog in a special post from Friday 8th November.


Back to the Thanksgiving Hop ...

There'll be 3 randomly drawn winners of a $15 gift code each from all the comments left on the STAMPlorations Blog, the designer's blogs and the corresponding posts on STAMPlorations Facebook and Instagram pages.

Commenting closes Sunday 8th December, so does entry to the Rafflecopter prize draw. The winners will be announced Tuesday 10th December in the November Winners Post on the STAMPlorations Blog.

More details and the links to all the participating designer's blogs can be found in today's post here on the STAMPlorations Blog.


That's it from me for today. Pop over to the STAMPlorations Blog to join the fun.
Have a lovely day!

hugs
Monika xxx


here is what I used from the STAMPlorations Shop:

Gratitude Trees, Gratitude Trees Layering Dies, Dots All Over Stencil
preview-GratitudeTrees preview-gratitudetreesdies preview-web-stencil-077-DotsAllOver

You can check out all of their current promotions here.